
Medical Foot and Hand Control Development: 13 Stages from Application Requirements to Production
Developing a custom medical control is not simply a progression from concept to prototype to production. Requirements, design definition, cost, manufacturing strategy, and documentation all mature together as the program advances. An experienced development process reduces uncertainty early and uses each stage to make the next decision with better information. Preliminary concepts establish direction. Engineering review resolves technical constraints. Physical prototypes confirm details that cannot always be evaluated effectively in CAD. Supplier and manufacturing input refine the production approach. Formal release reviews confirm that the product is ready to move from development into repeatable manufacturing.
This does not mean every program passes through each activity only once. Certain stages may be revisited as new information becomes available. The distinction is important: effective iteration is not guess and check. It is evidence driven refinement of an increasingly mature design.
The objective is to make changes when they are informed, controlled, and comparatively inexpensive rather than discovering them after tooling, documentation, or production processes have already been finalized.
At a high level, a custom medical control program can be viewed across six phases:
Application Requirements
Preliminary Design
Prototype Development
Design Refinement
Verification Support
Production Implementation
Within those phases are thirteen practical stages.
Stages 1 Through 3: Application Definition and Preliminary Design
Stage 1: Understand the Application
Development begins with the application rather than the physical control.
Before defining pedal geometry, button placement, sensing technology, or enclosure construction, the engineering team needs to understand what the operator is trying to accomplish and how the control interacts with the larger medical system.
Depending on the application, this review can include operator functions, electrical interfaces, communication protocols, actuation requirements, environmental exposure, cleaning and disinfection, ingress protection, cable and connector requirements, expected service life, regulatory considerations, human factors, and anticipated production volume.
This early work has disproportionate influence on the remainder of the program.
A control used intermittently in a clinical office may have very different design priorities from a multiaxis control used continuously during a surgical procedure. Similarly, a simple contact closure and a microprocessor based control with redundant sensing, communication, indicators, and diagnostic functions require fundamentally different development approaches.
The better the application is understood at the beginning, the more effectively the design team can select the right technical architecture.
Stage 2: Establish the Design Direction
Once the application is understood, Engineering can determine whether the requirements are best addressed through an established platform, a modified architecture, or a substantially new design.
This is an important technical and commercial decision.
An established architecture may provide existing knowledge of materials, mechanisms, sensing methods, environmental protection, manufacturing processes, and field performance. Depending on the extent of modification, some existing verification evidence may also remain applicable, subject to technical assessment.
A more extensively customized product may provide greater design freedom but can require additional tooling, development, verification, documentation, and manufacturing preparation.
The objective is not to minimize customization at all costs. It is to apply customization where it creates meaningful value for the application while retaining proven design elements where they remain appropriate.
That is one of the areas where experience with medical operator controls matters. The engineering challenge is often not determining whether something can be designed, but determining which portions of the design should be new and which should build on established knowledge.
Stage 3: Develop and Review the Preliminary Concept
The preliminary design converts application requirements into a configuration that can be reviewed technically and visually.
Depending on the program, this can include renderings, mechanical layouts, pedal or button arrangements, preliminary electrical architecture, cable and connector locations, operator interface concepts, and enclosure configuration.
High quality visualization is particularly useful at this stage because the OEM can evaluate major design decisions before significant resources are committed to physical hardware.
Expert review also begins to challenge the design at this point.
Can the required actuation force be achieved within the available geometry? Is the proposed cable exit compatible with the anticipated use environment? Can the enclosure support the required ingress protection? Does the operator interface create an opportunity for unintended activation? Can the proposed sensing architecture provide the required performance and redundancy?
Refinement at this stage is highly efficient because the design is still inexpensive to change.
Stage 4: Develop the Budgetary Quotation
Quotation should mature with the product.
Early in development, the available information generally supports a budgetary quotation rather than final production pricing. This provides the OEM with an initial view of expected cost based on the proposed architecture, anticipated annual volume, materials, electronic content, customization, and known manufacturing requirements.
The purpose is to support program planning and commercial feasibility while engineering definition is still developing.
That distinction matters.
Attempting to create production level cost certainty before the design is sufficiently defined creates false precision rather than better planning. At the same time, waiting until development is complete before discussing cost can allow technically attractive concepts to move too far before commercial constraints are understood.
A strong development process brings engineering and commercial information together early.
The initial quotation therefore becomes the first of several progressively more informed cost assessments.
Stage 5: Refine the Requirements for Prototype Development
Once the preliminary direction is accepted, the design must be defined sufficiently to create meaningful physical prototypes.
Customer specifications and applicable documentation are reviewed in greater detail. Component requirements are established. Interface details are clarified. Drawings and bill of material information begin to take shape. Purchased components, custom materials, test requirements, regulatory considerations, and required manufacturing or test equipment are identified.
The objective at this stage is not to prematurely freeze every production detail.
It is to create a prototype configuration that is controlled and representative enough to answer the questions the development team needs answered.
A prototype should be designed with a purpose.
If the primary concern is ergonomics, the prototype must accurately represent operator interaction. If the concern is sensing performance, the relevant geometry, electronics, and firmware need to be representative. If assembly feasibility is being evaluated, the prototype needs enough production intent to expose meaningful manufacturing issues.
This is where experienced engineering judgment helps prevent prototype activity from becoming experimentation without a defined objective.
Stage 6: Prepare the Prototype Quotation
Once the prototype is better defined, the commercial picture can also be refined.
The prototype quotation reflects considerably more information than the earlier budgetary estimate. It can incorporate development quantities, custom components, supplier costs, prototype tooling, internal fabrication, assembly requirements, testing, specialized materials, and component lead times.
Supplier involvement can become particularly important at this stage.
A component that appears straightforward during concept development may carry tooling requirements, minimum order quantities, material restrictions, or lead times that influence the preferred design. Identifying those constraints before the prototype is built allows Engineering to evaluate them as design inputs rather than discovering them later as production problems.
This illustrates an important principle of custom development:
Cost definition improves as design definition improves.
The budgetary quotation establishes feasibility.
The prototype quotation reflects the actual development configuration.
The production quotation later reflects a substantially more mature understanding of how the product will be manufactured.
Stage 7: Finalize the Prototype Design and Plan the Build
Following authorization to proceed, Engineering completes the work required to construct the prototype.
Prototype drawings and BOM information are finalized to the level required for the build. Long lead components are identified. Purchased and internally produced components are coordinated. Assembly, PCBA, software, test, and other activities are scheduled as applicable.
The method used to build the prototype should also be selected deliberately.
Some early development work is efficiently completed using engineering resources. Other prototype activities benefit from production equipment, manufacturing personnel, or production representative processes.
The appropriate approach depends on what the prototype is intended to demonstrate.
What matters is maintaining control of the configuration so that the team knows what was built, what differed from the intended design, and which conclusions can reasonably be drawn from the result.
Stage 8: Build, Inspect, and Document the Prototype
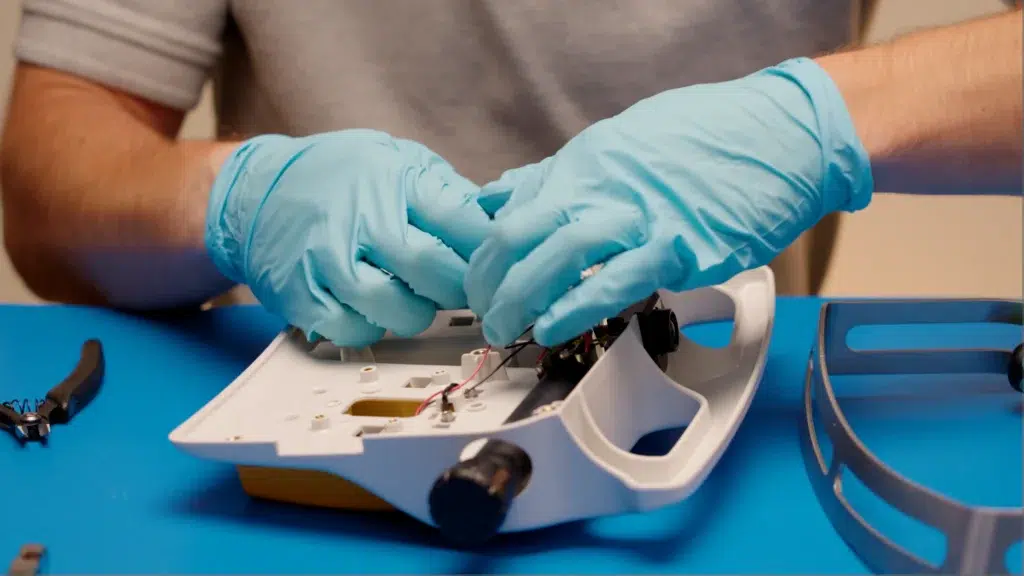
Physical hardware reveals information that drawings and simulations cannot always expose.
A cable routing path that looks appropriate in CAD may create an assembly difficulty. Tolerance interaction may affect mechanical feel. A component location may limit inspection access. An actuation force that meets the numerical requirement may still benefit from refinement after representative evaluation.
These are not failures of the design process. They are precisely the types of questions a properly planned prototype is intended to answer.
During the build, experienced engineers look beyond whether the unit simply functions. They evaluate component fit, assembly sequence, routing, fastening, sensing alignment, manufacturability, inspection access, testability, and other characteristics that influence the eventual production design.
Build observations and configuration differences should be documented so the resulting knowledge is not lost when the program advances.
That principle is embedded in the controlled process: prototype build notes and variances are captured during closeout so they can inform subsequent documentation and release activities.
Stage 9: Evaluate the Prototype and Refine the Design
The prototype allows the design to be evaluated in the context for which it was created.
The OEM may assess ergonomics, actuation characteristics, usability, system compatibility, functional behavior, labeling, cable management, and interaction with the host equipment.
Engineering evaluates the same hardware from another perspective: Does the mechanism behave as expected? Are tolerances appropriate? Can assembly be simplified? Did the sensing architecture maintain adequate margin? Are there opportunities to improve robustness or manufacturability?
This is where development may intentionally return to an earlier activity.
A finding might lead to a dimensional adjustment, component change, revised requirement, updated drawing, or another prototype.
The important point is that the design is not being changed randomly.
Each refinement is based on new evidence.
Expert led iteration should progressively remove uncertainty from the design.
Some programs require very little refinement because the application closely matches an established architecture. More complex or highly customized programs may require additional evaluation cycles.
Both can represent disciplined engineering when each cycle has a defined technical purpose.
Stage 10: Establish the Production Configuration
A successful prototype does not automatically become a production product.
The transition into production should be deliberate.
Prototype findings are reviewed, applicable changes are incorporated, and the product begins to be defined as a controlled production configuration. Production materials, components, part numbers, tooling, test requirements, manufacturing equipment, and documentation needs are established.
This transition is especially important because knowledge obtained during the physical build must not remain with only the people who built the prototype.
The controlled process requires relevant prototype closeout information to be incorporated into applicable production documentation when the product advances into production release.
That creates a formal connection between what Engineering intended to build and what was actually learned by building it.
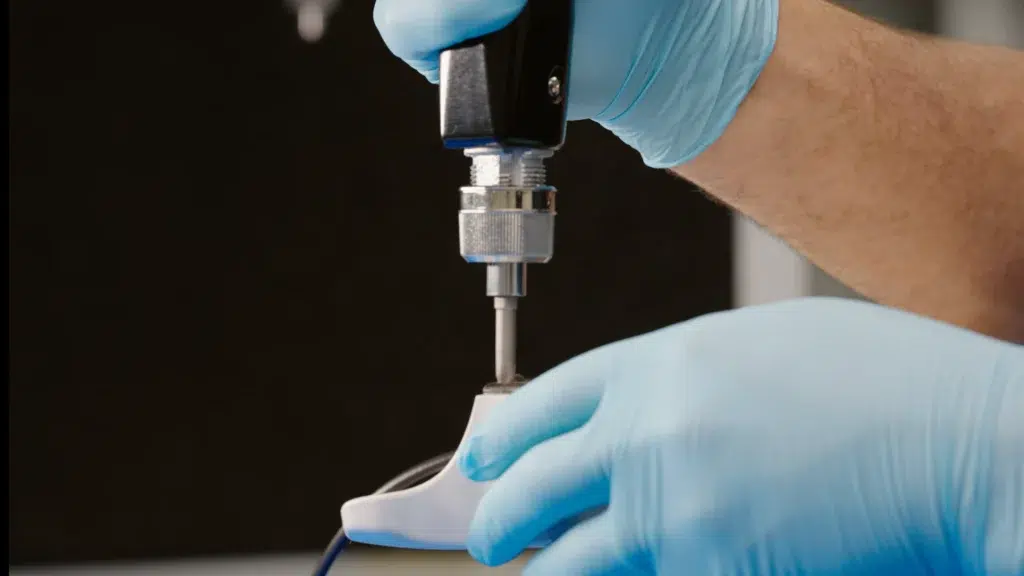
Stage 11: Develop the Production Quotation
By the time the production configuration is established, the program contains far more commercial information than it did during concept development.
The production quotation can now reflect actual or substantially defined material requirements, supplier pricing, lead times, manufacturing processes, production labor, tooling, test requirements, expected annual volume, and quantity based pricing.
This is why quotation should be viewed as a progression rather than a single event:
Budgetary Quotation
Prototype Quotation
Production Quotation
Each stage replaces assumptions with better information.
- A mechanical feature can affect tooling.
- A connector decision can affect both material cost and assembly labor.
- A sensing architecture can influence PCB complexity, test requirements, and software development.
- A cosmetic requirement can alter material selection or secondary processing.
- An annual volume change can influence whether a process should remain manual or justify dedicated tooling or automation.
For a custom medical control, engineering and commercial decisions are inseparable.
The production quotation therefore represents not simply a later price, but a price based on a much more mature understanding of the product and how it will actually be produced.
Stage 12: Complete Production Documentation and Conduct the Preproduction Review
Designing a product and preparing that product for repeatable manufacturing are related, but they are not the same task.
Production readiness requires the technical definition to extend beyond the top level design.
Depending on the program, the controlled package can include component and assembly drawings, specifications, BOMs, manufacturing routings, quality test documentation, labels, inspection requirements, manufacturing instructions, and other applicable records.
Prototype learning is incorporated where appropriate rather than requiring Production to rediscover those lessons.
The design then undergoes a formal preproduction review.
This is an important engineering control point because a product can function correctly and still not be ready for routine manufacturing.
The review considers whether the product can be purchased, planned, manufactured, assembled, tested, inspected, and controlled as intended.
If an unresolved condition is identified, additional work can be completed before unrestricted production proceeds. The controlled process specifically allows the program to return for further work or proceed under an Engineering Hold when remaining conditions still need to be addressed.
That ability to revisit an earlier activity should not be confused with uncertainty about the design direction.
It is a deliberate quality gate.
A mature development organization does not advance a program simply because the next box exists on a flowchart. It advances when the available evidence supports the decision.
Stage 13: Production Implementation
Once the applicable release requirements have been satisfied, the product can transition into routine manufacturing planning.
Material availability is reviewed, purchased components are ordered as required, production activity is scheduled, and manufacturing and inspection can proceed against the controlled configuration. TM-393 places these activities after the formal release steps, including planning, material availability review, component ordering, and job creation.
The emphasis has now changed.
During development, the team was progressively determining and refining what the product should be.
During production implementation, the objective is to manufacture the defined configuration consistently and repeatably.
Where an OEM program requires dedicated verification or validation builds, those activities should be coordinated with the applicable production configuration and manufacturing requirements so the units being evaluated are appropriately representative of what will ultimately be supplied.
A Structured Process Should Enable Refinement, Not Prevent It
A thirteen stage framework can appear linear when shown on a page.
Engineering development rarely is.
The important distinction is not whether a program ever revisits a stage. It is why it revisits that stage and what new information is being incorporated.
An experienced development team may intentionally return to an earlier activity because:
- physical evaluation reveals an opportunity to improve ergonomics
- supplier engineering identifies a more robust manufacturing solution
- testing provides data that supports an improved design margin
- production readiness review identifies documentation or process work that should be completed before release
- OEM evaluation clarifies an application requirement
- a manufacturing review identifies an assembly improvement
These are evidence based refinement loops.
They are fundamentally different from repeatedly building hardware until something happens to work.
The role of engineering expertise is to make each development cycle purposeful, to anticipate as many issues as practical before physical hardware is created, and to use each new piece of evidence to reduce the remaining uncertainty.
Iteration should converge the design.
Quotation Matures Alongside Engineering
The same principle applies commercially.
A quotation developed during concept evaluation cannot contain the same level of certainty as one developed after supplier input, prototype construction, design refinement, and manufacturing review.
Trying to treat all three as equivalent ignores how custom product development actually works.
A budgetary quotation answers: Is the proposed program commercially viable enough to continue?
A prototype quotation answers: What will it take to build and evaluate the development configuration?
A production quotation answers: What will it take to manufacture the defined product repeatedly at the anticipated volume?
Maintaining those distinctions gives both the OEM and the development team better information at the point when each decision needs to be made.
Prototype Learning Should Become Production Knowledge
One of the greatest opportunities in product development is the information generated during the prototype build itself.
The value of a prototype is not limited to whether the customer likes it or whether it passes a functional test.
A prototype can expose how the design assembles, where tolerances interact, how components route, what inspection access exists, where manufacturing variation may matter, and whether the intended test strategy is practical.
That information should not disappear when the prototype leaves Engineering.
A mature development process deliberately converts prototype observations into production knowledge:
Design
Prototype
Evidence
Refinement
Controlled Production Configuration
That is a much more valuable outcome than simply producing a successful sample.

Production Release Is More Than a Documentation Exercise
The transition to production should not be treated as paperwork completed after the engineering work is finished.
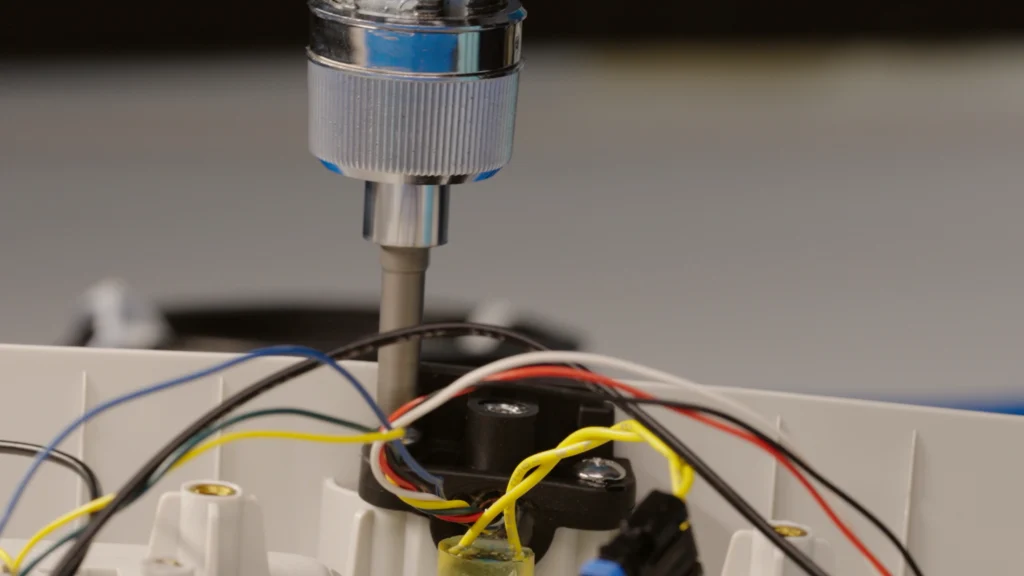
It is where the organization demonstrates that the engineered product can also be purchased, manufactured, assembled, tested, inspected, documented, and controlled repeatedly.
That requires collaboration across engineering, manufacturing, quality, purchasing, planning, and other functions involved in bringing the product into routine production.
A strong preproduction review creates the opportunity to identify remaining gaps before they become manufacturing problems.
The objective is not simply to release documentation.
The objective is to establish a production system capable of repeatedly delivering the intended design.
Summary
The development of a custom medical foot or hand control can be viewed across thirteen stages spanning application definition, preliminary engineering, quotation, prototype development, design refinement, production release, and manufacturing implementation.
The process is structured without being artificially rigid.
Engineering expertise establishes the architecture and anticipates technical risks early. Budgetary pricing develops alongside the concept. Prototype quotation reflects a better defined development configuration. Physical hardware provides focused evidence about usability, performance, assembly, and manufacturability. That evidence is used to refine the design where necessary. Production quotation then reflects a substantially more mature understanding of the product and manufacturing approach.
Before routine production begins, prototype learning is incorporated into the controlled configuration and the product is reviewed for manufacturing readiness.
A mature development process does not attempt to eliminate all iteration.
It makes refinement purposeful, evidence based, and progressively more precise.
Requirements mature into designs. Designs are confirmed through representative hardware. Prototype knowledge is converted into production knowledge. Cost estimates become more accurate as uncertainty is removed. Production begins when both the product and the process are sufficiently defined.
That is how a promising medical control concept becomes a repeatable production product.
Discuss Your Medical Control Application
The earlier the application, interface, operating environment, anticipated volume, and program requirements are understood, the more effectively an experienced development team can identify the appropriate architecture and development path.
Whether the best solution begins with an established control platform, a modified architecture, or a fully custom design, the objective is the same: apply the right engineering knowledge early, refine the design using meaningful evidence, and carry that knowledge through into a robust production solution.

Meet The Author

Arijan Kandic
Digital Marketing Specialist
Arijan is the Digital Marketing Specialist at Linemaster Switch Corporation and holds a bachelor’s degree in business management from Quinnipiac University. He manages the company’s SEO strategy, Google Ads campaigns, and digital marketing initiatives, and develops educational content for the Linemaster Learning Center to help engineers, OEMs, and medical device manufacturers better understand foot switch technology. Arijan works closely with Linemaster’s engineering and applications teams to translate complex technical concepts into clear, accurate articles on foot switch design, customization, and compliance considerations.
In Collaboration with

Sean Lewis
Director of Engineering
Sean has more than fifteen years of experience in product development, engineering governance, and cross functional technical operations. His background in metal fabrication, including machining, forming, welding, and inspection, provides a strong manufacturing foundation that supports his approach to design and process optimization. Sean holds a bachelor’s degree in mechanical engineering, an MBA with a manufacturing concentration, and an MSOL. He is a Certified SolidWorks Expert with advanced capability in CAD, rendering, simulation, and rapid prototyping. Sean also specializes in DFMEA and PFMEA risk management practices and is the holder of several foot switch design and utility patents.
Uploaded 09/14/2026
Custom Foot Switches
Linemaster’s custom footswitches are designed to meet specific user requirements, offering a range of features such as various pedal configurations, wired and wireless options, and customizable LED indicators. These custom footswitches provide reliable, durable solutions tailored to enhance functionality in diverse applications.

